

Lighting fixtures are manufactured in different countries resulting in various types of color-coding. Hence the need to know how to wire a light fixture with two black wires.
Literally, the color coding varies in different countries depending on various electrical standards. In the United States (US), the National Electrical Code (NEC) has black and white color codes. Black is for the hot wire, and white for the neutral.
Whereas in other countries like India and the UK, black wire is neutral. In addition to the country of origin, there may be two other reasons the fixture has two black wires, inter alia.
One could be that the fixture is an antique implying that the fixture was manufactured a while ago. Second, someone might have converted a lamp to a hardwired fixture.
That notwithstanding, it is important to identify the hot/live and neutral wires to avoid fire and shock hazards. There is, therefore, a need to step by step identify the procedure to wire the light fixture with two blacks. This is a measure to mitigate risks such as shock and/or fire;
“Before commencing any electrical installation/wiring works, always comply with electrical safety regulations.”
How To Wire A Light Fixture With Two Black Wires
Warning! If you are not sure of how to carry out the wiring, contact and consult a qualified electrician with the proper equipment.
Step 1: Wire Identification
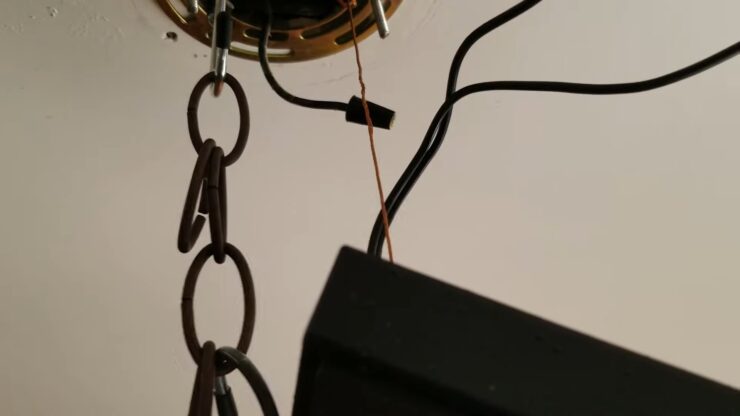
Using a phase tester or voltage meter, check the ceiling wires (mostly black and white). For the a/c (alternating current) supply, the two black wires from the light fixture can be connected interchangeably.
In addition, some of the light fixtures with two black wires have different markings to differentiate between hot and neutral. The black to be connected to the hot from the ceiling may be marked with text indicating voltage.
Equally, by examining the wires further, one wire could have a feel of a rough texture (hot) and the other smooth (neutral). In another instance, there could be two black wires from the light switch, one black and one white wire on the light fixture.
On the electrical wires from the switch, on the ceiling, the live/hot and neutral wires can be identified by the phase tester or meter.
Step 2: Ensure the Safety
As a safety measure, always ensure that the power supply to the point of installation is cut off. To achieve this, ensure that the breaker is in off position or the fuses are removed.
Then turn off the switch that powers the light fixture. Confirm that there is no power at the electrical wires from the wall switch by the voltage tester before commencing any works.
Step 3: Polarity Check
Without mounting the fixture to the ceiling rose, hook it temporarily, and perform a live test. Join one of the fixture wires to the hot (black) electric wire from the switch and the other wire to the neutral (white) wire.
With a voltage meter, attach one probe on the fixture pocket sleeve and the other on the ground wire. Request a helper to turn on the power (take caution to avoid a shock).
A positive voltage indication implies that the wire polarity is reversed. Correct the polarity by reversing the wiring connection.
Step 4: Mounting Position
After locating and identifying the wires in step 1 above, check the fixture mounting base and ensure it matches the ceiling rose. For a new installation, there might be a need to for taking further base measurements and mark on the ceiling.
But for a replacement, you just confirm that the fixture base and ceiling rose dimensions match and they fit. If they fit, then there is no need to take them apart.
Position the fixture face on the ceiling base and align the mounting holes with the bolts on the base. Mount the light fixture base to the ceiling rose with the light fixture and electrical wires from the switch hanging.
Tighten the provided nuts (if not provided, purchase some from local hardware stores) onto the base bolts using the correct size wrench.
Step 5: Connecting The Wires
Take note of the wires as identified in steps 1 and 2 above.
Before connecting the wires with the correct polarity, ensure that the power supply is cut off at the breaker. Have the fuses removed to enhance safety? Check and confirm with the phase tester.
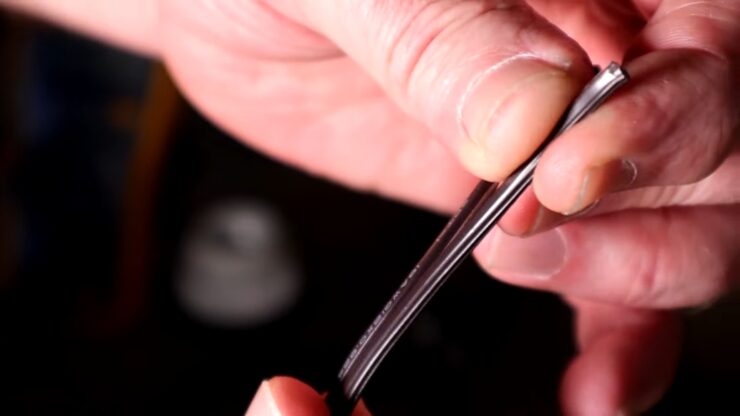
Strip the wires about half (½) inch of the insulation sheath from the tip of the black wires using a wire stripper. In line with the results of the polarity check and wire identification, make connections and wire the fixture.
Using wire nuts, secure each connection tightly to avoid loose connection and electric shock. On the light fixture, connect the ground/earth wire to the pin mounted on the body and tighten.
If the ground pin is not provided on the fixture, drill a hole at the base and screw in a ground screw with a screwdriver. Connect the earth wire on the screw.
Step 6: Testing The Fixture
If the fixture requires inserting a bulb, insert the bulb into each receptacle of the fixture. Restore the fuses removed earlier and turn on the circuit breaker.
Test the operation of the light fixture with the respective wall switch.
How To Wire A Light Fixture With Two Black Wires: Required Tools
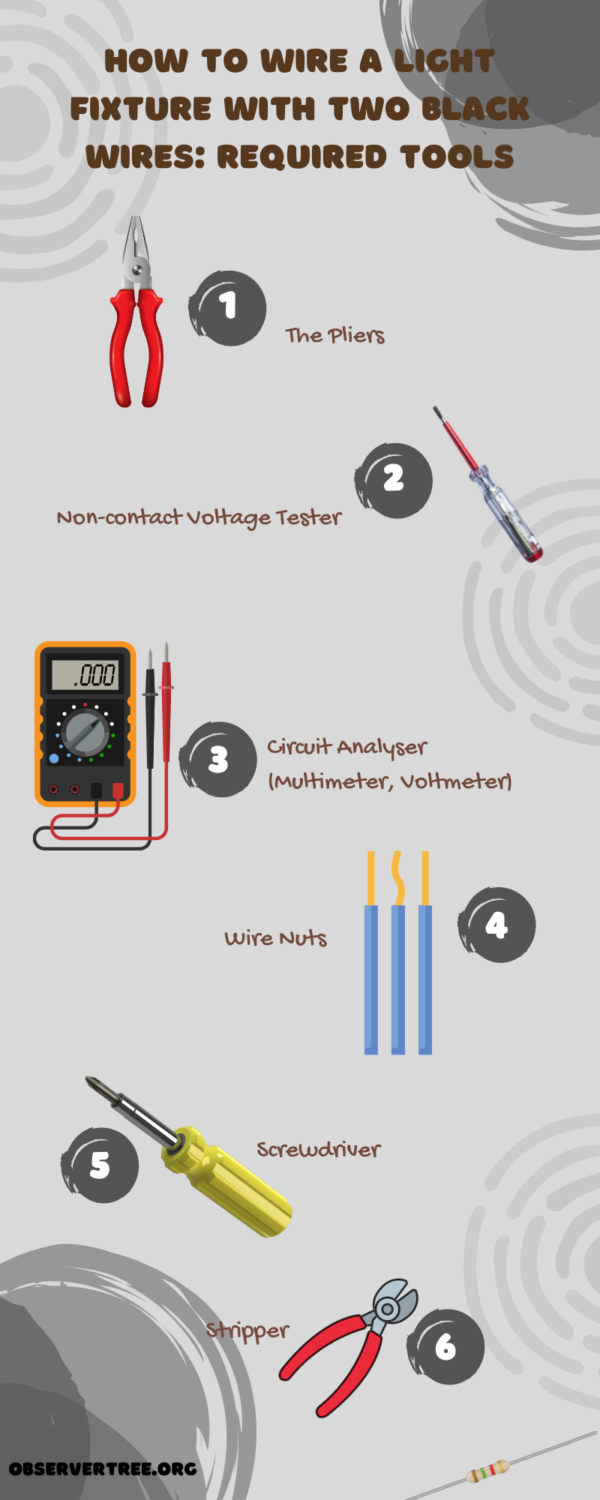
To accomplish the installation of the light fixture correctly, these tools will be required;
The Pliers
Tightening of wire connections will require the use of the pliers to avoid the risk of fire and fixture failure from looseness. Tight connections will be achieved by twisting the wires.
- Equally, the pliers will be used when cutting the wires to remove protrusions and making of neat connections.
Non-contact Voltage Tester
- Being one of the most crucial tools, a voltage tester will be used to ensure that there is no voltage. Additionally, it will be used when locating the hot and neutral wires.
Circuit Analyser (Multimeter, Voltmeter)
- A circuit analyzer will display immediate information about the circuit to connect the light fixture. All information about polarity and voltage will be acquired and displayed on this tool.
Wire Nuts
- Also referred to as twist-on wire connectors, wire nuts will be utilized during wire connections. They are mostly used to fasten low-voltage electrical wires providing insulated connections.
Screwdriver
- Screwdrivers are other essential tools during any wiring installation. They will be used during screw tightening.
Stripper
- A wire stripper will be used to strip sheaths of wires to expose the copper part for connection.
Safety Precautions
To avoid risks of shock and fire, caution MUST always be taken during the installation process. Always observe these safety measures before, during, and after the installation;
- Before wiring the fixture, inspect all wires (both on the fixture and the circuit) for damaged insulation or broken cords. If the fixture or circuit wires are damaged, replace them or the fixture.
Before commencing any wiring, ensure that the power supply to the point of work is cut off. A circuit breaker at the mains box should be turned off and fuses pulled out.
- Where possible, tag the breaker with a warning of the ongoing work to avoid someone else turning on the breaker.
Always check the tools to be used for proper operation and insulation. A faulty voltmeter will give an inaccurate result, and that can result in wrong judgment.
- Equally, ensure that the tool’s insulation is intact to avoid electric shock.
- On the light fixture and circuit, check for and be observant of any warning signs and note them. Also, ensure the local electric code is well followed.
- Put on appropriate Personal Protective Equipment PPE. Use insulated rubber gloves to protect from electric shock in cases of accidental contact with the hot wire.
If the fixture to be wired is in a high position, check the ladder or support to be used for any hazard. Ensure that the ladder is well supported and stable.
- If possible, avoid using an aluminum ladder or support to minimize the risk of electric shock.
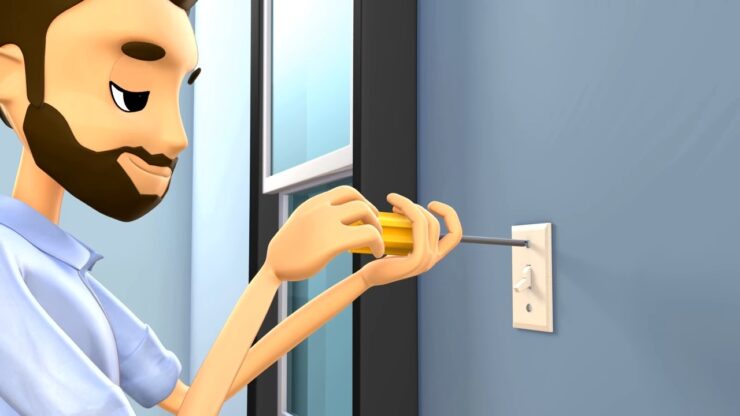
How To Wire A Light Fixture With Two Black Wires: Installation
Conclusion
There is no other option unless you learn how to wire a light fixture with two black wires, it’s essential. Generally speaking, all electrical light fixtures have similar installation procedures.
Depending on the country of origin, electric wires have different color coding. However, the coding should not be a worrying thing since careful checking and identification will ensure successful installation.
Correct wiring of the light fixtures and other electrical components ensures the long operation of the equipment without failure. The risk of electric hazards as shock, fires, and electrocution is also reduced.
Above all, it is advisable to involve a qualified electrician in the wiring of any equipment. An electrician, with proper knowledge of the country’s electric code, will ensure that the equipment and circuit, in general, meets the requirements.
Hazards such as fire often result in a lack of compensation by insurers when the wiring is done incorrectly or by an unqualified and unlicensed electrician.
Also important is the fixture manufacturer’s manual or instructions on wiring and installation. Keenly follow the instructions as indicated on the manual and observe the safety guides.
Along with the manual, check for a warranty in the event that the fixture fails to function. The fixture can be returned to the supplier or manufacturer if it fails despite following the wiring instruction and observing all safety measures.