
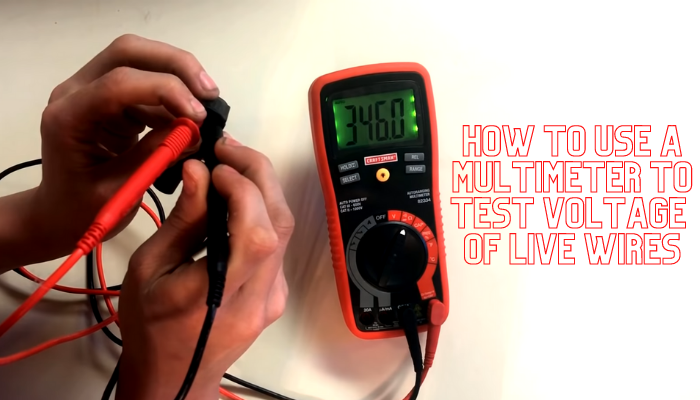
Those who often deal in working with a lot of electric wiring must ask themselves how to use a multimeter to test Voltage of live wires?
It’s always risky to work with live wires. When testing them, use the utmost caution. Make sure the wires don’t come into touch if they’re exposed.
Switching off the power until a user is ready to test for Voltage is also a good idea. The ideal tool for checking a live wires’ Voltage is a multimeter.
Therefore, it not only indicates that the wires are live (i.e., there is a flow of current through them), but it also indicates the amount of voltage present.
As a result, this can aid in diagnosing an electrical fault or the testing of an outlet or switch. Go through this blog to learn about the way to test the live wires’ Voltage with a multimeter.
How to Use a Multimeter to Test Voltage of Live Wires: The Procedure
So, here we are with the main point of discussion: how to use a multimeter to test Voltage of live wires? Let’s understand the Steps in detail.
Multimeters aren’t just any instrument; they’re a critical digital tool for determining ohms, ampere, and Voltage across wires.
It is essential to remember that working with live wires might be dangerous. Live wires have enough energy to cause major bodily harm, and in some circumstances, death.
As a result, one should proceed with caution when conducting the testing. Here are five easy procedures for testing a live wire’s Voltage with a multimeter:
Step 1: Make sure that one is safe
Working with electricity or a live wire, precautions must be taken. However, when working with AC voltages of 120 or 220 V, it’s ideal if one thinks about safety more than usual.
When using any multimeter for electronic devices and electrical works, one must follow typical safety considerations such as not touching a live wire with the bare hand.
Even if they have to move the cable, they must put on an insulating glove first. Also, if there is a need to measure an electrical value in an AC circuit, make sure to switch the multimeter from DC to AC.
Finally, it is advised to begin the test with the highest current range or Voltage possible.
Step 2: Select Voltage as the parameter
Turning the selection knob to Voltage is the next Step. As previously stated, the multimeter can be used for the measurement of Voltage, resistance, and current.
A standard multimeter can detect voltages from 200 millivolts to 600 millivolts AC or DC.
To measure DC voltage, use the component labeled V and a straight line in the voltage section of the multimeter. Similarly, to measure AC, utilize the V region and a wavy line.
A users’ reading accuracy is determined by where they place the knob.
The knob for selection should be set to AC for testing the Voltage of the house socket which is commonly 110 V or 220 V in various countries.
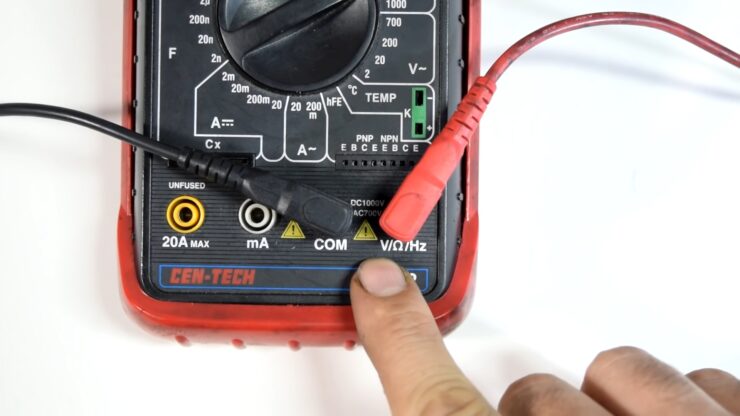
Step 3: Connect the Probes
Plug the probes into the relevant ports after appropriately setting the selection knob for the voltage magnitude and the type of current a user wants to measure.
On the basis of the multimeter type, there are two, three, or more ports. A COM, MAV, and 10A ports are included in a traditional three-port multimeter.
However, when monitoring highly high currents, only utilize the 10 A port.
The COM stands for Common, and it’s where a user must plug in the black probe, which they’ll nearly always connect to the circuit’s negative or ground.
A MAV port enables resistance, Voltage, and measurements of current up to two hundred mA. The red and black probes, however, do not differ in any way.
Therefore, when a user wishes to measure the Voltage, they should plug the probes into the COM and MAV ports.
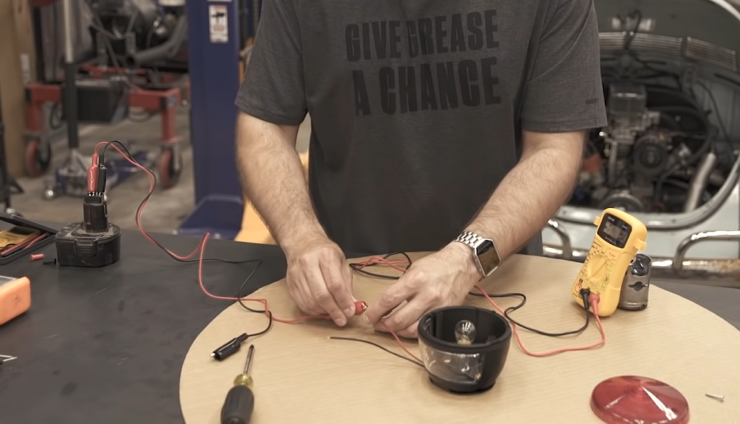
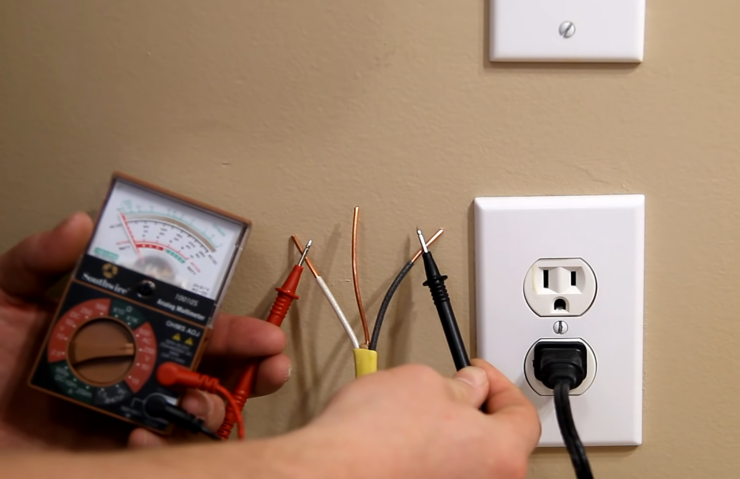
Step 4: Putting the Probes to Work
After one has set up the probes, one may move on to the real testing part. But, first, it is advisable to test the multimeter on a genuine live wire to ensure everything is in working order.
One will detect a reading on the display if the red probe is placed on the live line and the black probe is placed on the neutral cable.
A user may also use the black wire to connect to the ground wire and the red wire to connect to the live wire and still find a reading.
After testing it and confirming that it works, they can check any other live wire they wish. When a user twists the black and red wires together, nothing wrong will happen.
If a user turns it by accident, the voltage reading will be a fraction of what it should be. This is because a multimeter is used to measure the Voltage of a live wire connected to the Common (COM) port.
Step 5: One must write down what they’ve learned
No voltage exists on the wire if a user receives a zero on the screen after testing it. To put it another way, there is no current going through the wire.
If one knows their way around electrical wiring, they can try to discover the power source to remedy the problem, but they should get in touch with an electrician for assistance if they don’t.
Voltage Measurement: the Guidelines
The difference between the charge (electrical) between the points in an electrical or electronic circuit, measured in volts, is Voltage.
It calculates the potential energy of an electrical field for generating current in a conductor. Almost all measurement instruments can measure Voltage.
Alternating current (AC) and Direct current (DC) are the two most frequent voltage measures (AC).
Although measuring Voltage is the simplest of the various forms of analog measurements, noise issues create different obstacles.
Voltage, resistance, current are all measured in volts, ohms, and amps, accordingly. A series of plumbing pipes is a useful example for understanding these phrases.
The Voltage is similar to water pressure, the current is similar to the rate of flow, and the resistance is the same as the pipe diameter.
Tools like multimeters, voltmeters are pretty popular in measuring voltages.
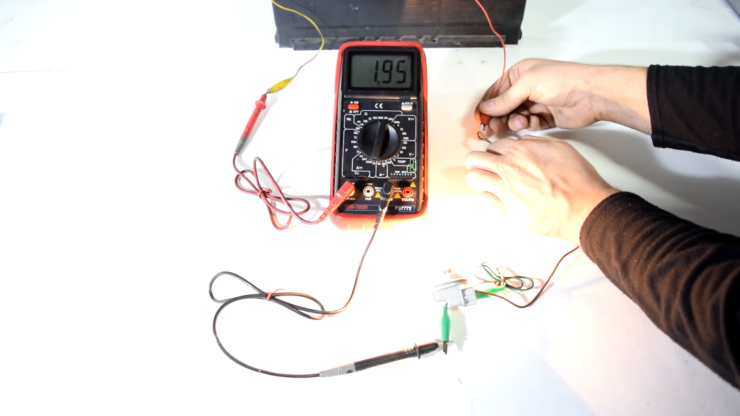
How to Measure a Voltage with a Digital Multimeter
Digital multimeters are the most convenient tool for measuring Voltage and other electrical metrics like amps and ohms. Here’s the process of measuring Voltage using a multimeter:
- Attach the leads (black and red) in the V and COM slots, respectively. With the middle selection dial, choose between DC and AC voltage.
- Decide on the voltage range one should be testing.
- Before doing anything further, test the multimeter on a battery.
- Check the display measuring voltage and make any necessary adjustments.
Measuring Voltage Using a Voltmeter
Here is how a voltmeter is useful to check Voltage:
- On the voltmeter knob, select the voltage type.
- Increase the voltage range by one setting above the voltage one will be measuring.
- Make a positive connection with the red probe and a negative connection with the probe (black).
- Check if it reads 0 by touching the probes together.
- Attach the probes to the appropriate terminals and read the display.
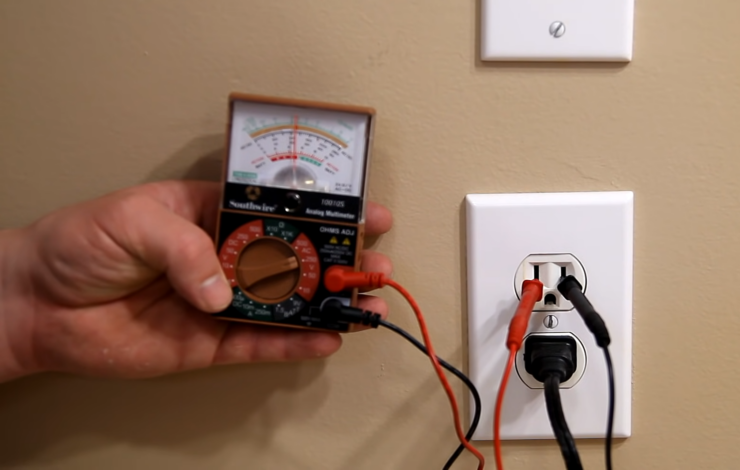
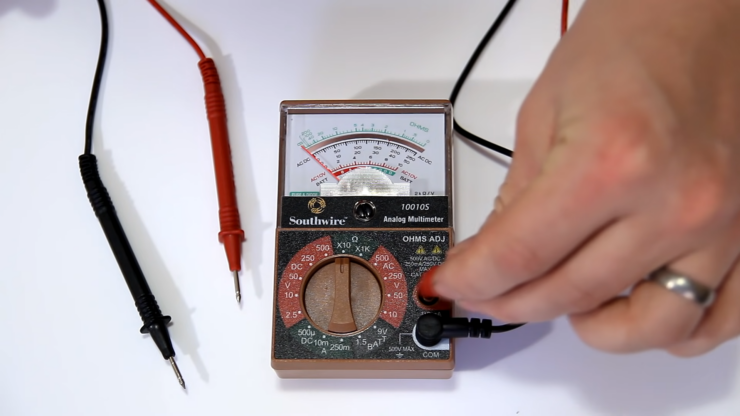
Using an Analog Multimeter for Measuring Voltage
Let’s check how an Analog Multimeter can measure Voltage:
- Set the multimeter to DC or AC voltage mode.
- Start with a high range and gradually reduce it until the needle reads appropriately.
- Connect the other terminal (negative) to the other probe (black) and the terminal (positive) to the red probe.
- Check to verify if the needle is displaying the correct Voltage and make any necessary adjustments.
What is a Live Wire: the Definition & Mechanism
A live wire, often known as a hot wire, is a conductor that transmits electrical current in the form of fluctuating Voltage.
In some cases, contact with the wire might result in an electrical shock because a body can act as a ground, allowing energy to travel along something that won’t have resistance, the body, to get to the ground.
Therefore, one must take special precautions to reduce the electrical shock-related risks from live wires, whether domestic wiring or underground electrical wires.
A live wire can be hazardous when left unattended. Several cases of mishaps occurred where people lost their lives when they came into contact with live wires.
Such a situation is even more dangerous in the monsoon season, where there are more chances of strong current flow through water.
Depending on the area, a live wire may be brown, black, or red. As a result, this warns people that it is electrified and carries current.
The so-called “neutral” wire in residential electrical wiring is the complimentary wire.
Wire enters into the live one, travels inside the circuit that the appliance produced, and departs through the other wire (neutral) to reach an appliance.
There is insulation in the live wire, with the thickness of the insulation varying according to the Voltage. As insulating materials, plastics, textiles, gels, and paper, can all be used.
In addition, insulation prevents shorts by limiting contact with other conductors. It also prevents a live wire from energizing something like an appliance’s casing.
Insulation, especially in hostile conditions, wears out with time.
Electrical wiring should be inspected regularly for signs of danger, such as worn insulation or significantly potentially broken or bent wires.
How to Use a Multimeter to Test a 220v Outlet: The Easiest Method
Let’s check the Steps to measure a 220v outlet with a multimeter:
- Step 1: Precaution is the key
Because one will be testing on a live outlet, one must take precautions when completing this test.
First, one must ensure that they hold both of the multimeter probes in one hand, protecting them from being electrocuted.
One should also avoid allowing the probes’ metal portions to become attached since this could result in fatal issues such as a short circuit.
- Step 2: Learn about the location of the outlet
It’s important to remember that an outlet has three slots: one for neutral, one for hot, and one for the ground.
- Step 3: Locating the circuit breaker
Ensure you locate the 220v outlet’s circuit breaker in the major panel of the circuit, generally located in the utility room.
A circuit breaker’s label can be found on the door of a panel; so, the 220v outlet is likely to be a maximum two-pole breaker.
- Step 4: Setting the multimeter
One must set their multimeter for measuring Voltage and turn on the energy.
After that, they should turn the selector knob on the multimeter to the AC side and pick the approximately known settings of the Voltage to match the outlet voltage.
- Step 5: Connecting the tester leads
In the multimeter, one should connect the two tester leads.
The blackjack, which has a (-) signal (negative), is the one where the black lead should be inserted and the red lead in the (+) blackjack has a positive (plus) signal.
As a result, these jacks are color-coded to make it easier to identify them and ensure proper connections are made.
- Step 6: Connect the two test leads to the outlet’s two slots
The voltage readout should be between 220-240 volts once correctly plugged in.
- Step 7: Test lead (black) should be plugged into the neutral slots
A black test lead should be plugged into a neutral slot, and the other test lead (red) should be plugged into a hot slot.
Such a phenomenon is also true for three and four prolonged outlets; prolonged neutral outlets are typically L-shaped.
As a result, check the Voltage displayed, which will read something in the range of one-hundred-ten to one-hundred-twenty volts.
Remember to disconnect the test leads from the outlet and turn off the multimeter after the work is finished.
- Step 8: Final testing
After properly testing the text on a 220V outlet with the multimeter and receiving substantial readings that offer a green light, it’s time to put the cord (dryer) into the outlet, as it’s now ready to start working.
If the readings do not match the needed volts, one must not try to plug in the dryer since one could be electrocuted.
FAQs on How to Use a Multimeter to Test Voltage of Live Wires
Q1. How to find out if the wire has life (current inside) without a multimeter?
Ans: Obtain a socket and a light bulb, as well as a few wires, and connect them.
Then connect one with the neutral or with the ground, and the other to the wire-under-test. It is alive if there is light in the lamp.
However, if the lamp does not light, try it on a known live wire (such as a wall socket) to ensure it works.
Q2. How to check 240 voltage with a multimeter?
Ans: Ascertain that the meter is set to 250 VAC or a higher AC setting than 120 VAC. Then, insert one wire (probe) into the meter’s standard connector.
Place the other in the meter’s “voltage” socket.
One probe should be inserted into the large output slot, while the other should be inserted into a slot, the smaller one. As a result, one will get the Voltage at the outlet.
Q3. How can I check if an AC house wire has Voltage present on it?
Ans: Multimeters are standard tools for displaying the Voltage in a circuit and showing whether there is any power present or not. Consult an electrician for any doubts.
Set a multimeter for measuring Voltage (V) under alternating current (AC) and turn it on. Put the meter to the test.
Q4. How do you know if the neutral wire on a circuit is live or not?
Ans: A neutral is used as a reference since the neutral is constantly at zero potential. We measure the Voltage at the live wire using this as a reference.
In other words, if the neutral is always set to zero, the potential at the live wire changes. The ground cable is now a neutral wire with zero potential.
Q5. How to test a ground wire with a multimeter?
Ans:
- The multimeters’ probes should be connected to the meter’s main body.
- The multimeter should be set to the highest available AC voltage range.
- The two test leads should be inserted into the neutral and hot sections of the output.
- The black lead should be removed from the socket and placed in the ground.
Q6. How to know if electrical wiring is bad?
Ans:
- Circuit breakers were frequently tripped.
- Lights that flicker or dim.
- Sounds of buzzing or crackling
- Wires that have frayed
- Wiring made of aluminum or knob-and-tube
- On the walls or the outlets, there are warm or vibrating areas.
- Smoke is emitted from appliances or outlets.
- Electrical fittings with scorch marks or a burning odor.
Q7. How to test house wiring?
Ans: A multimeter should be set to the AC voltage setting of 200 volts to test the wiring in a house.
Connect the probes to the multimeter, and then insert the other ends into one of the sockets. After a moment, one can witness what Voltage is present in the circuit.
Q8. Why is it said that it is more dangerous to touch the live wire than neutral wire?
Ans: Touching the live wire of a mains supply is more dangerous than touching the neutral wire since there is a high potential of 220V in a live wire.
Whereas the neutral wire has no potential because it is grounded at the power station, touching the neutral wire is not risky.
Q9. What happens if I touch a live electric wire?
Ans: When one comes into contact with an electrical voltage, the current will travel through the body, causing electrical shock and burns.
As a result, severe harm or perhaps death may occur. Unfortunately, electricity is used as an energy source without any consideration for the dangers it can pose.
Q10. What are the differences between living, earth, and neutral wire?
Ans: A live (brown) and neutral (blue) wires of a plug are the two wires that make up the whole circuit with an appliance for the household.
The earthing wire (yellow and green) is added as a line of safety and is generally not a circuit’s part. Therefore, the voltage values are different for these wires.
Conclusion
Hopefully, after going through this review, one has the answer to the question: how to use a multimeter to test Voltage of live wires?
One must though remember, that testing or working with electricity is something pretty risky. As a result, one must be very careful. Otherwise, it will lead to a severe hazard.
Multimedia is a useful tool for all electrical testing. However, it’s always better to consult an electrician for any doubts or more complex electrical issues.
Check out some other picks from Amazon also: